
At Groundhog North, we build a lot of paver patios around the Lakes Region, and we can tell you firsthand that picking the right materials makes all the difference. Get the base, pavers, sand, and edging right, and you’ll end up with a patio that looks great and holds up for years. Skip a step or cut corners on materials, and you’ll be dealing with shifting, weeds, or drainage headaches down the road. In this guide, we’ll walk you through everything we use and recommend — the base layer, paver options, sand, edging, the tools you’ll need, the key installation steps, and how to keep it all looking good once it’s in. Think of it as the checklist we’d hand a friend before they started their own patio project.
Key Takeaways
We supply every layer of your paver patio from our New Hampton Materials Center, base to edging.
Our 60-person crew sources bulk gravel, sand, and pavers in-house for consistent quality.
We process our own bulk materials, ensuring your project never stalls due to shortages.
Delivery or pickup options let you get base gravel, bedding sand, and pavers on your schedule.
Comprehensive Checklist for Paver Patio Materials
Here’s a rundown of what goes into a paver patio, section by section, so you know what you’re working with before you start.
Base Layer Materials:
The base layer is what gives your patio its stability and lets water drain properly. It’s usually gravel, plus geotextile fabric if you want extra protection.
Gravel: We use crushed stone or gravel here because it drains well and can bear the weight of the pavers without shifting or settling over time.
Geotextile Fabric: This one’s optional, but we like adding it — it keeps weeds from pushing through and helps stop soil erosion, so your patio holds up longer.
Paver Materials:
Picking the right pavers is where your patio’s look and durability really come together.
Concrete Pavers: These come in tons of colors and styles, and they’re budget-friendly without sacrificing versatility.
Natural Stone Pavers: Bluestone, granite, and similar options give you a more natural, elegant look if that’s the style you’re after.
Brick Pavers: If you want a classic, timeless feel, brick is a great pick — we see it a lot in traditional landscape designs.
Sand:
Sand’s job is to lock your pavers together while still letting water pass through.
Polymeric Sand: This is what we reach for to fill the joints between pavers. It hardens once it’s wet, which keeps weeds and bugs out and keeps everything locked in place.
Edging Materials:
Edging is what keeps your pavers from creeping out of place and gives your patio a clean, defined edge. We always recommend using solid, durable edging to lock down the perimeter.
Plastic or Metal Edging: This keeps pavers put and gives you a clean border — a simple way to help your patio’s design last.
Concrete Edging: Want something more permanent? Concrete edging holds up well and adds a nicer finished look too.
Installation Tools:
Having the right tools on hand makes the whole job go a lot smoother. Here’s what you’ll want:
Excavation Tools: Shovels, a pickaxe, and a compactor will get your site ready.
Leveling Tools: A level and string line help make sure your pavers sit even, which matters a lot for how stable the patio feels underfoot.
Preparation Steps:
Good prep work up front saves you headaches later.
Site Assessment: Take a look at your soil type, drainage needs, and how much sun the area gets — all of this shapes your design and layout.
Excavation: Clear out the grass and soil to make room for your base layer, and dig deep enough to leave room for proper drainage.
Installation Considerations:
A few details here really matter for how your patio performs over the long haul.
Slope for Drainage: Make sure your patio slopes away from your house or any other structures so water doesn’t pool up and cause damage.
Pattern Layout: Plan out your paver pattern before you start laying anything — it’ll look better and you’ll waste a lot less material.
Finishing Touches:
These last steps really shape how your patio looks and holds up.
Sealing: A good sealant protects the surface and helps your patio last longer.
Landscaping Features: Adding plants or lighting around your patio brings the whole space together.
Maintenance Supplies:
A little upkeep goes a long way in keeping your patio looking sharp.
Cleaning Supplies: Keep a broom, some mild soap, and maybe a pressure washer on hand for regular cleanings.
Sealant: If you go the sealing route, we suggest reapplying a quality sealant every few years to keep the elements from wearing it down.
What Base Materials Should You Use for a Strong Paver Patio?
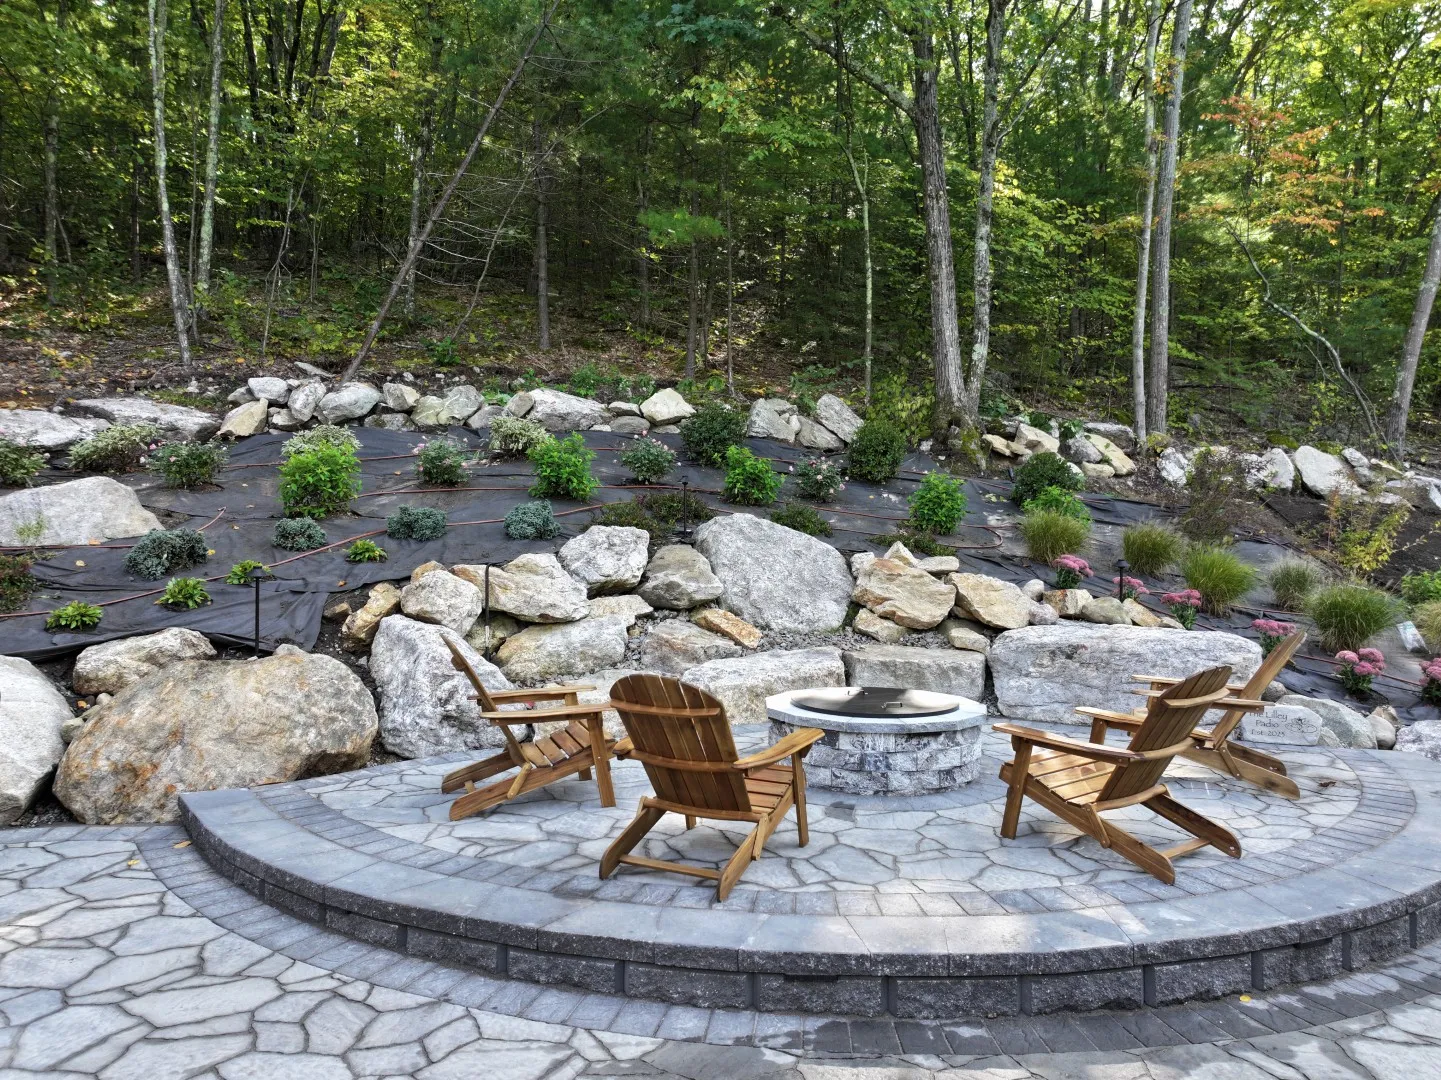
For a patio that’s built to last, the base is everything. We use crushed stone or gravel for solid drainage and support, and we’ll often add geotextile fabric too, since it helps prevent sediment buildup and keeps things stable underneath.
Which Types of Gravel and Crushed Stone Work Best as a Patio Base?
We typically go with 3/4 inch crushed stone or gravel — it drains well and gives the pavers above a solid, dependable foundation to sit on.
How Deep and Compact Should Your Patio Base Be?
As a rule of thumb, we excavate the base to about 6-8 inches deep, then compact it thoroughly so it stays stable and doesn’t shift on you later.
How Do You Choose the Right Sand for Your Paver Patio?
For sand, we lean toward polymeric sand every time — it holds up better over the years and keeps weeds from creeping in between your pavers.
What Are the Differences Between Bedding Sand and Polymeric Sand?
Bedding sand sits underneath and supports the pavers directly, while polymeric sand fills the joints and hardens once it gets wet — that’s what gives you the erosion control and added stability.
Why Is Polymeric Sand Popular for Long-Lasting Patio Joints?
We love polymeric sand because it creates a strong bond between pavers that keeps them from shifting, blocks weeds, and keeps insects from settling in — all of which adds up to a patio that lasts.
What Are the Best Edging Options to Keep Your Patio Secure?
You’ve got a few solid choices here: plastic, metal, or concrete edging. Which one we recommend depends on how permanent you want it and the look you’re going for.
How Do Different Edging Materials Affect Patio Stability and Appearance?
Good edging does double duty — it keeps your pavers locked in place and gives your patio clean, defined lines that make the whole thing look more finished.
What Are Easy Installation Tips for Patio Edging?
Our best tip: dig a proper trench for the edging to sit in before you install it. That one step secures everything in place and makes your whole layout look and function better.
How Should You Prepare Soil and Handle Drainage for Your Paver Patio?
Good soil prep starts with clearing out grass, roots, and other organic matter, then grading the area so water flows away from the patio instead of pooling up. That’s how you avoid erosion and standing water down the line.
Why Is Proper Soil Preparation Crucial for Patio Longevity?
We can’t stress this enough — getting the soil prep right prevents compaction problems, keeps drainage working the way it should, and keeps your whole patio stable for years to come.
What Drainage Solutions Help Prevent Water Damage Under Your Patio?
Gravel layers, proper grading, and drainage pipes are the tools we rely on to keep water moving and off your patio’s base — that’s what keeps standing water and damage from becoming a problem.
FAQ
What materials go into the base layer of a paver patio?
The base layer uses crushed stone or gravel for drainage and weight support, plus optional geotextile fabric to block weeds and prevent soil erosion.
What types of pavers are available for a patio?
Options include concrete pavers for budget-friendly versatility, natural stone pavers like bluestone or granite for an elegant look, and brick pavers for a classic, timeless feel.
Why does Groundhog North recommend polymeric sand for paver joints?
Polymeric sand fills joints between pavers and hardens when wet, locking everything in place while keeping weeds and bugs out.
Conclusion
In closing, a great paver patio really comes down to what’s underneath and around it—the base, the bedding layer, the edging, and those final joint materials all working together. Skip a step or skimp on quality, and you’ll feel it down the road. Take your time gathering the right materials, or lean on folks who work with this stuff every day. Either way, you’re building something that’ll hold up beautifully for years to come.
